5 Gathering Techniques
Still gathering the same way you always have? Learn 5 methods for easy gathers perfect many projects.
Gathering fabric to join to another piece is used in dressmaking to create volume and eye-catching design. This could be as simple as gathering skirt panels to fit into a dress bodice, or creating attractive ruffles that attach to a hem, cuff, or collar. In couture or Avant Garde clothing shapes can be over the top and very dramatic.
The goal is to create evenly distributed gathers and adjust to the perfect length to fit into the corresponding garment piece.
With all our patterns, the perfect amount of fabric to be gathered is built into the pattern by us so you don’t have to do any tricky maths. But I regularly speak to sewists who want to create tiered gathered skirts and don’t know what maths to use: the rule of thumb is, the length of your panel that you will gather should be two or three times the length of the panel that you attach it to. The lighter weight your fabric, the more gathers it can handle!
I’ll take you through the ways you can gather and which technique to use for different fabric types.

1. Machine gathering
The most common method if to sew two or three rows of parallel basting stitches across the fabric. You set your stitch length to it’s maximum and don’t back stitch at the ends. Instead, you leave long thread tails that you can pull to draw the fabric.
If gathering along an edge, sew one row of stitching 1cm from the raw edge, and the next 1cm (or the width of your presser foot away
Three threads will give you better control for even distribution, but most people find two rows sufficient (plus it’s quicker and wastes less thread). And this works for most stable fabrics!
Hold the bobbin threads and push the fabric to gather your fabric, as the lower threads are slightly looser than the top due to the way the machine creates each stitch.
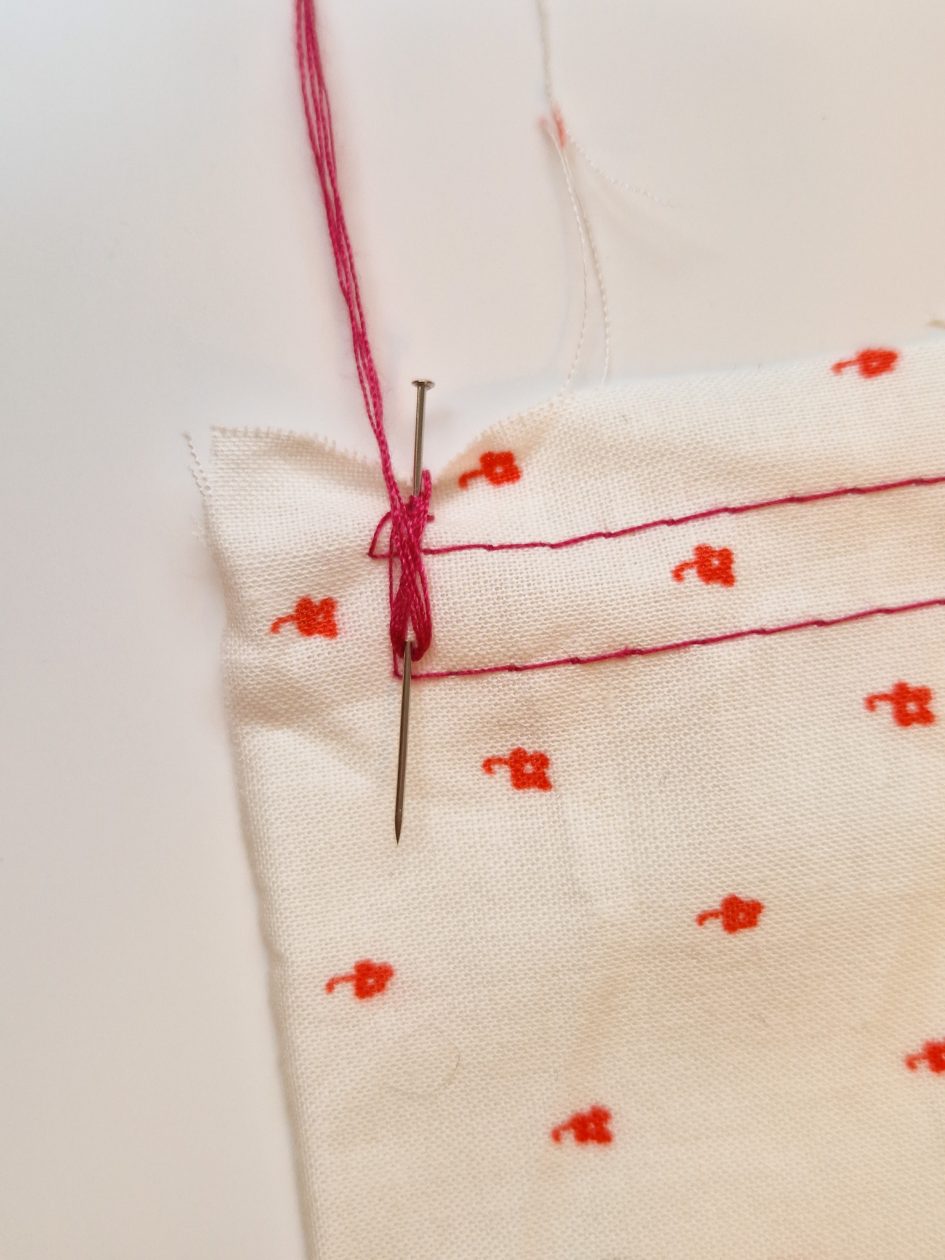
Some people like to tie the thread tails together in a knot to stop them coming loose. You can also wrap your threads around a pin in a figure eight at one end to achieve the same effect.
2. Hand gathering
The least popular method involves hand basting the long stitches in a straight line near the edge of the fabric. Just like the machine you create long stitches with thread tails for you to pull by hand. This technique is best used on chiffon and silk or similar fabrics that are prone to snagging. Try to position your gathering inside the seam allowance to avoid unsightly holes when you remove the threads.
You can also use the dividing method if the area isn’t too large. This is primarily used for easing fabric into a seam for example, a slightly too small wrist cuff into an armhole on a sweatshirt. Pin the ends of each panel. Then mark the centre point of each panel and pin together. Mark the halfway points between each pin (this would be the quarter points) and pin. Then continue pinning halfway points until you have successfully distributed the fabric to fit each other.
3. The Floss method
Now we’ve got hand gathering out of the way. Let’s look at one of the kookier methods… dental floss can be used for gathering fabrics! But I would recommend using thread, cord or knitting yarn instead.
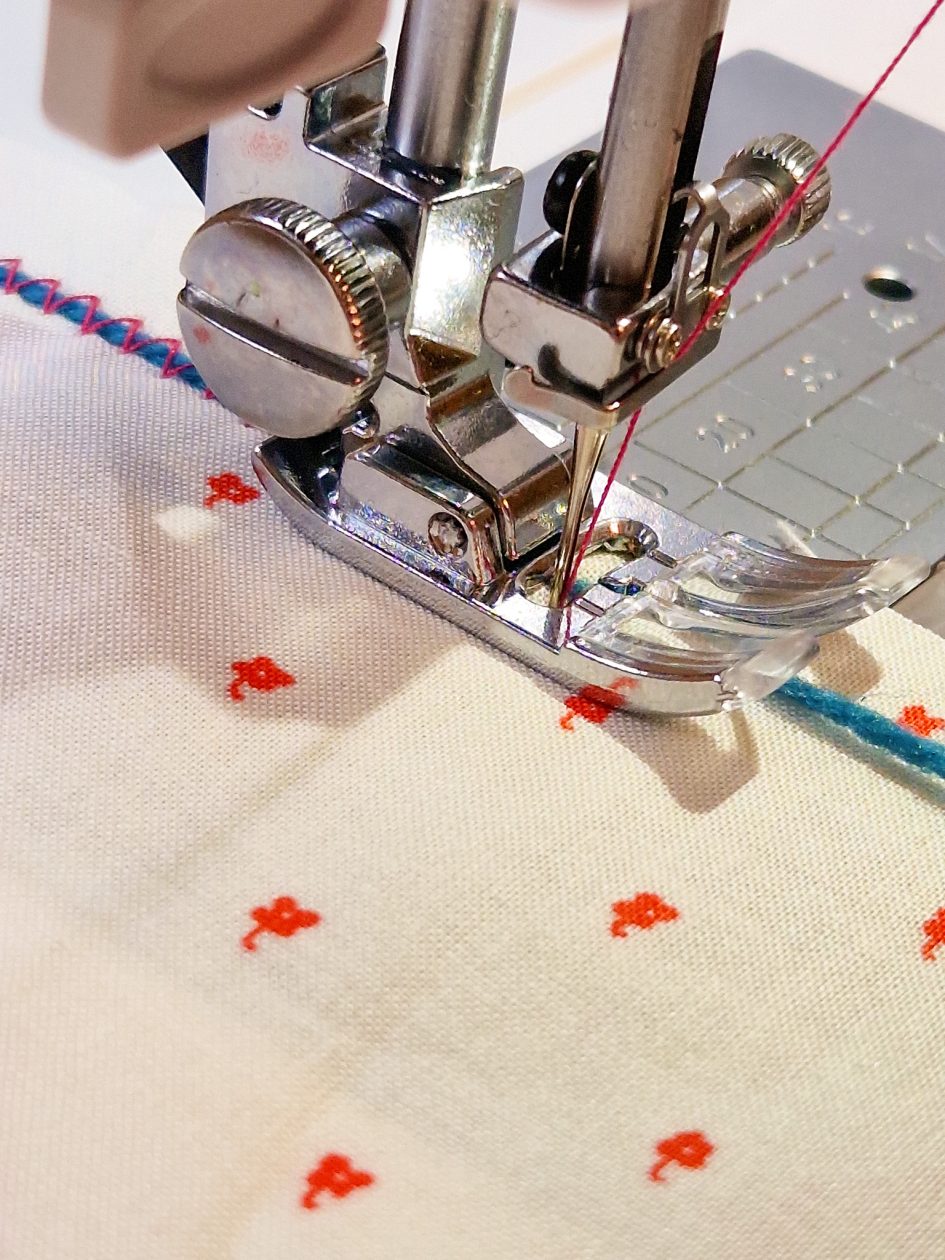
Set your machine to a zig zag stitch around 5mm wide. Lay the yarn along the fabric and stitch the zigzag over the top, ensuring the stitching doesn’t catch the yarn at all. Secure the thread and yarn together at one end. Then hold the yarn at the other end and push the fabric to gather.
This method works very well on thicker fabrics but it can be handy to use on long panels of mediumweight cotton as the yarn is easier on the hands and less prone to breaking mid gathering!
Watch our video here for tips!
4. Gathering with an overlocker
For certain projects you can get away with gathering by overlocker…. great for when you don’t need an exact length match. This is achieved with a few changes to the machine settings. Keep a note of your previous settings to revert back to after gathering.
Your differential Feed should be set to the highest setting (usually 2 or 3). And stitch length should be set to the biggest setting (usually 4 or 5).
Remember that you’ll be gathering close to the edge of the fabric rather than on either side of the seam line, just because of the needle positions you have on an overlocker. But this method is very handy for making trim or gathering knits.
You can gather a little bit more after stitching by pulling gently on the needle threads of your stitching, but you won’t get the same length control over finished length as with other methods.
5. Gathering or ruffler feet
Similar to the overlocker method, these feet are great for creating general gathers where you don’t need to make an exact length match.

With a gathering foot you can either gather a single layer of fabric, or thanks to a special slot in the foot, join a flat layer of fabric to the layer you’re gathering. They work well on lightweight fabrics and by lengthening the stitches and increasing the thread tension you can create full gathers.
A ruffler foot creates uniform pleats at set intervals and works well on heavier weight fabrics. This can create lovely even pleats when set at 6 or 12 stitches per pleat. Or you can set it to 1 stitch where it will look most similar to gathering. Just like the gathering foot you can also set it to attach the fabric it’s pleating to a flat layer of fabric simultaneously.
-

McCall’s Sewing Pattern M7212 Children’s/Girls’ Princess and Fairy Costumes
-
McCall’s Sewing Pattern M8026 Misses’ Tops
-
Butterick Sewing Pattern B6246 Misses’ Tulip-Hem Tops
-
Butterick Sewing Pattern B7032 Toddlers’ Dress with Sleeve and Neckline Variations
-
McCall’s Sewing Pattern M8151 Misses’ Skirts
-
McCall’s Sewing Pattern M7588 Children’s/Girls’ Peter Pan Collar Button-Front Top and Dress, Shorts, and Doll Dress
-
McCall’s Sewing Pattern M7647 Children’s/Girls’ Surplice Dress and Top, Trousers, 18″ Doll Top and Trousers
-
McCall’s Sewing Pattern M7857 Girls’ Sweater and Dresses
-
McCall’s Sewing Pattern M7468 Misses’ Cold-Shoulder Tunic and Dress