M7969 hacks and fitting tips

Our best selling pattern is still M7969 and has over 6000 inspiration images shared on Instagram alone. It was released in 2019 and clearly inspired makers around the world to try the loose easy-to-wear style.
If you’ve been waiting to try this pattern why not take a look at our fitting tips and some creative hacks to get the most out of your pattern.
We’re sharing tips for how to pick your pattern and answering “how much ease does M7969 have?”. Plus you can follow our tutorial for adjusting the bust coverage on the centre front bodice.
Then get inspired by 12 incredible hacks from our community… you won’t believe these are ALL THE SAME PATTERN!
WHAT PATTERN SIZE AM I?
The most common question we’re asked about all sewing patterns is what size to choose. So we’ve made three easy video guides to help you 1) measure yourself, 2) pick your pattern size and 3) how to use our sewing patterns.
In short, the best results come when you compare your personal body measurements to our size chart (on the envelope and website) AND the finished garment measurements (on the envelope and tissue paper) for that particular style. We design the garments with different amounts of ease aka how much space there is between your body and the fabric.
M7969 is a very boxy design. With around 3″ (6cm) of ease at the bust and around 10″ of ease at the waist – there is no waist shaping at all, it hangs from the bust down.
Then the gathered skirt is extremely loose with the finished width being 30″ wider than the hips.
You may prefer to size down from our recommended pattern size (as given by the size chart) if you don’t want such an oversized finished garment.
HOW CAN I GET MORE COVERAGE AT THE BUST?
With an oversized style like this you might find that the wrap point at the centre front position is quite low and revealing at the bust. Well not to worry, you can do a simple fix to raise the centre front point.
Make a quick toile to work out how much height you’d like to add to the wrap point.
Remember that the bias binding needs to be in place along the upper edge to truly know the finished wrap point at the centre front.
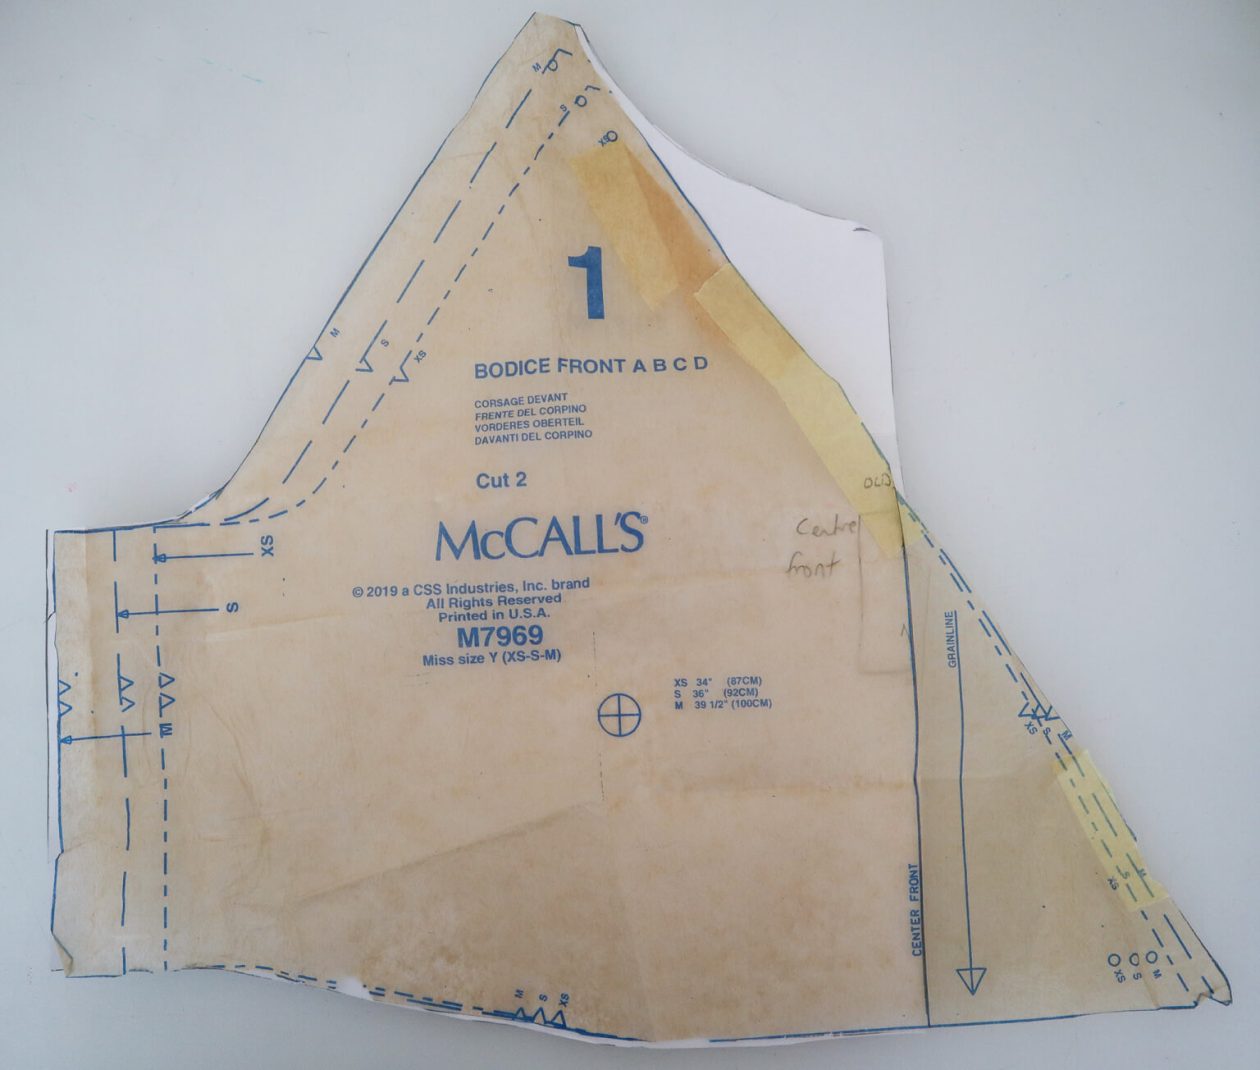
Tape excess paper to the front diagonal edge to give you room to work.
Extend the centre front line upwards. Then mark on that line a new point, at the amount you’d like to raise the neckline. In this example I raised the point 2cm.
Starting just after the circle marking near the shoulder draw a straight line from that position, through your new centre front point to the waist.
Redraw the waist edge to connect to the extension you’ve added.

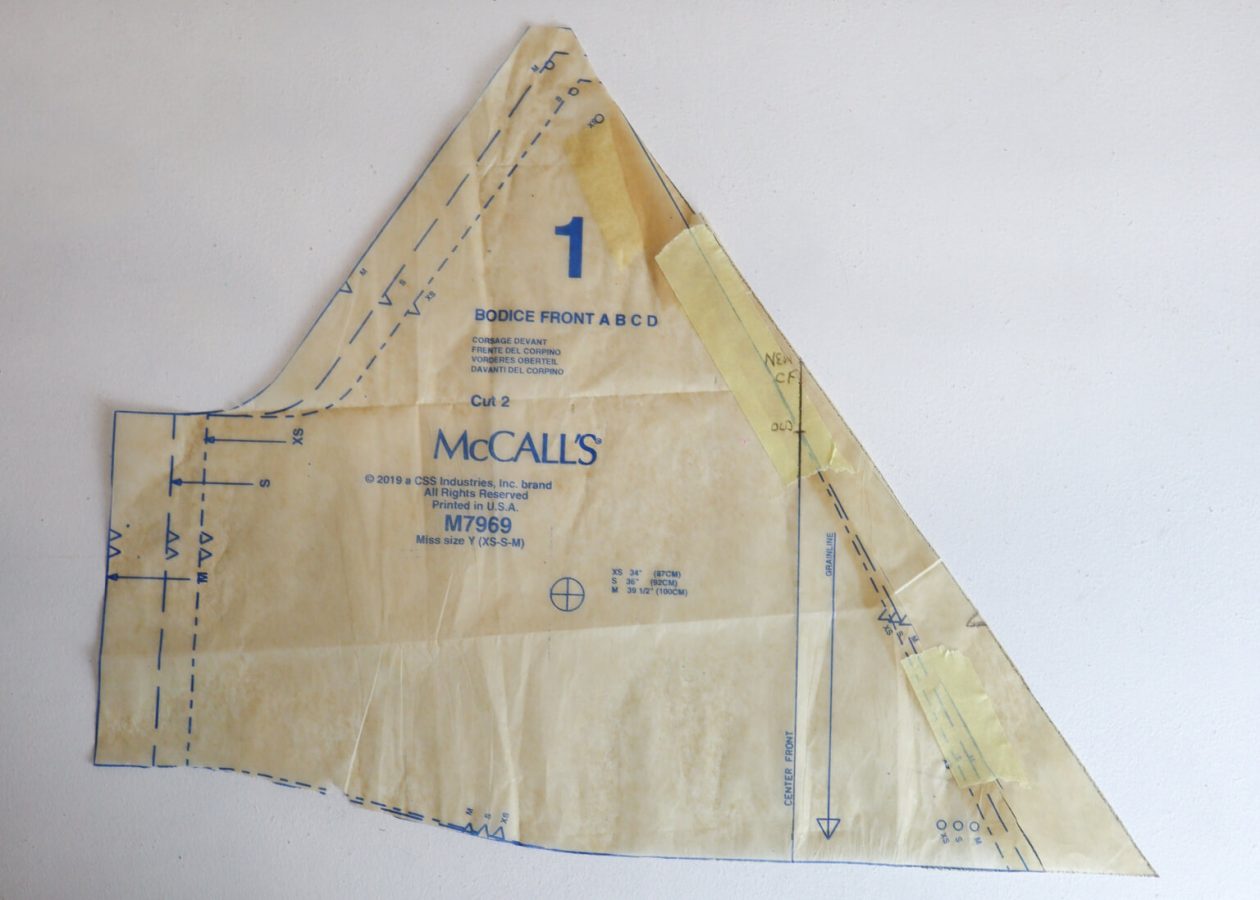
Measure the new length of the diagonal edge against the original and extend the length of your bias strip. Slash at a 90 degree angle near the pointed end of the pattern piece. Insert a block of tissue the required amount.
Lay the bias strip pattern piece along the diagonal edge, matching the small circles (just to the left of the number 8) and matching the waist edge with the pointed end of the stitch. Transfer the triangular notch from the bias strip in the corresponding place on the bodice to help you match them during construction.
INSPIRING HACKS


Let’s start easy…. chop the dress into a peplum top!
Make beautiful bell sleeves by leaving off the gathered cuff!


Round off the neckline and cut on the fold at the centre front! Keep reading to learn how.
Next step, cut with a centre front opening and add ties.


Add a long rectangular waist tie to the bodice for a wrap top
Instead of a peplum, add a shirred panel to the bodice

Frilling! Add a ruffle to the seam around the neckline.
Prefer a closer fit? Cinch with a coordinating fabric belt

Lengthen the bodice and sew to shorts with a zip up the back!
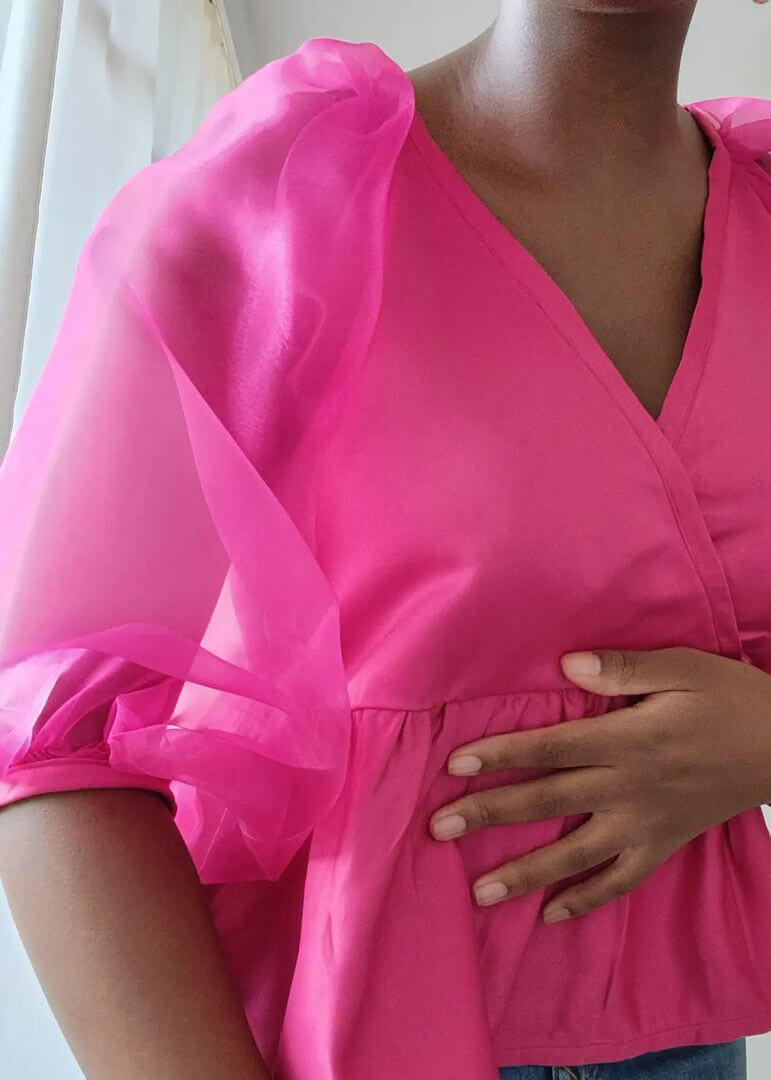
Use sheer fabric for extra drama, lining all except the sleeves


Cut view B as sleeve short and add shirring above the hem.
Big collars are so on trend – draft your own with tracing paper.
THE MOST POPULAR HACK
Rounding off the neckline is one of the most common hacks of McCall’s 7969. To achieve this you’ll need your bodice front pattern piece, bias strip piece, spare tissue, a ruler, pencil and sellotape.
Place your spare tissue behind the front bodice and weigh it down.
Trace around the armhole and side seam, and the waist edge.
Extend the centre front line up to the shoulder point. Mark the position you want the neckline curve to finish.
Remember that the bias binding needs to be in place along the upper edge to truly know the finished neckline height.
Draw a new neckline starting just beyond the small circle marking near the shoulder, connecting to the neckline point you created. Use a french curve tool, a dinner plate or free hand draw the line.
Transfer the notches and markings onto your new pattern piece and add a cut on fold notation.
Measure around the curve of your new neckline and compare it to the original diagonal front. Remove the appropriate length from the bias binding strip pattern piece and level off the pointed end into a right angle blunt end.