
How to assemble a PDF pattern
Have you just bought one of our PDF Patterns? Or maybe you’re curious how they work?

WHAT IS A PDF PATTERN?
PDF patterns are downloadable patterns offering you options to print at home (eg A4 tiled pattern sheets) or print through a large scale printer (A0 pattern sheets).
We have patterns with the following paper sizes included:
- A4 (210mm x 297mm)
- A0 (36” x 48”)
- US Letter (8.5” x 11”)
- US Legal (8.5” x 14”)
The instructions come in a separate file so that you don’t have to print these if you don’t want to. To save some paper you can just read them off your laptop, phone or iPad.
With a tiled pattern you can print at home on a normal domestic printer. You then assemble the sheets with glue or sellotape, and once that’s ready use them as if they’re a a normal tissue pattern.
Our print at home files include:
- Directions for assembling the tiles
- A layplan of how your tiles fit together
- The individual tiles for your pattern
HOW DO I PRINT A PDF PATTERN?
Stock your printer with A4, letter or legal size paper as required. Our recommended way to print is using the free programme Adobe Acrobat Reader. (Download for free here: www.get.adobe.com/reader). Don’t print using the web browser version, open the application fully.
Our patterns fall into two categories:
Blue Diamond PDFs
PDFs that are offered in four paper sizes including A0 will be referred to as Blue Diamond PDFs. These PDFs utilise a numbered Blue Diamond for tile alignment.

Green Diamond PDFs
Older PDFs that are only offered in three tiles sizes (A4, legal and letter) will be referred to as Green Diamond PDFs. These pdfs utilise a green diamond for tile alignment.
Check the print scale
Choose your paper size. Set your page orientation to Portrait and do not scale the file. Pages should be printed at 100% aka “actual size”.

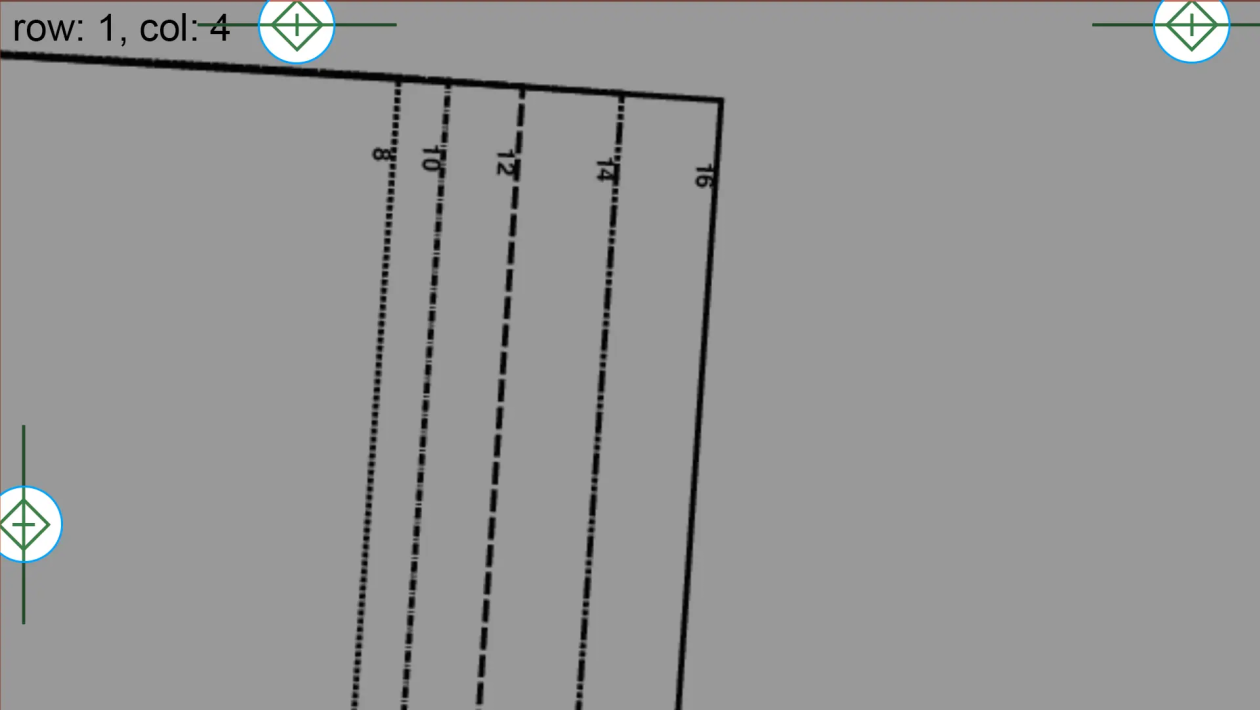
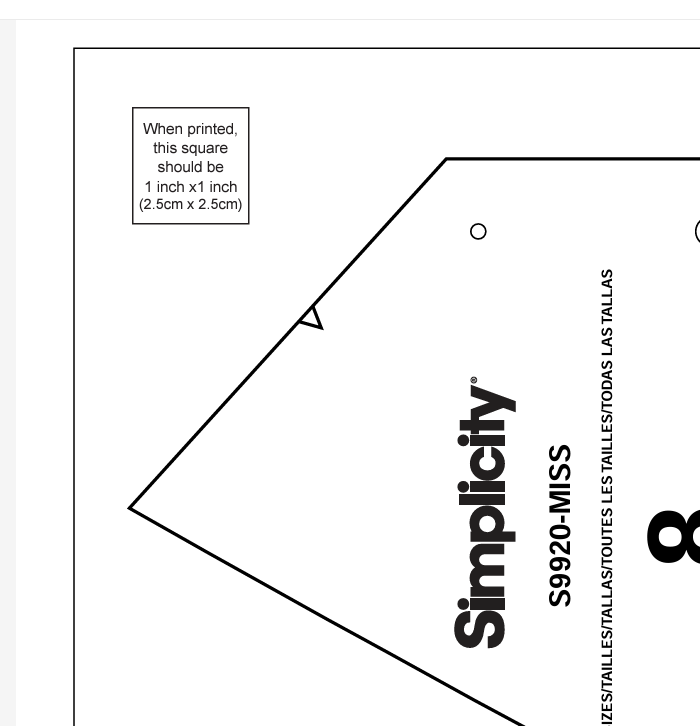
You’ll start by printing the first tiled page because this includes a test square measuring 1”x1”. Your measurement should be exact for your pattern to be sized correctly!
For green diamond PDF patterns, print the first page and measure the green diamond with a line through it that is printed at each border. Your measurement should equal exactly 1”.

If your pattern doesn’t print to the correct size your garment may not fit properly when finished. A few mm here and there can make all the difference!
Check your test square with a ruler or tape measure before you print all the sheets. If your test square measures accurately, then you can happily proceed. If your PDF isn’t printing correctly check your settings. Web software like Google Chrome or mobile phone apps that wirelessly connect to your printer can often add unwanted scaling that you aren’t able to turn off. This is why we recommend Adobe Acrobat.
Your print out will be in columns, progressing through all available pages.

TOP TIP!
You might want to only print certain pages that contain the size or pattern pieces you’re interested in. Mark your tile layplan to indicate which sheets you are working with if not printing everything.
HOW DO I ASSEMBLE A PDF PATTERN?
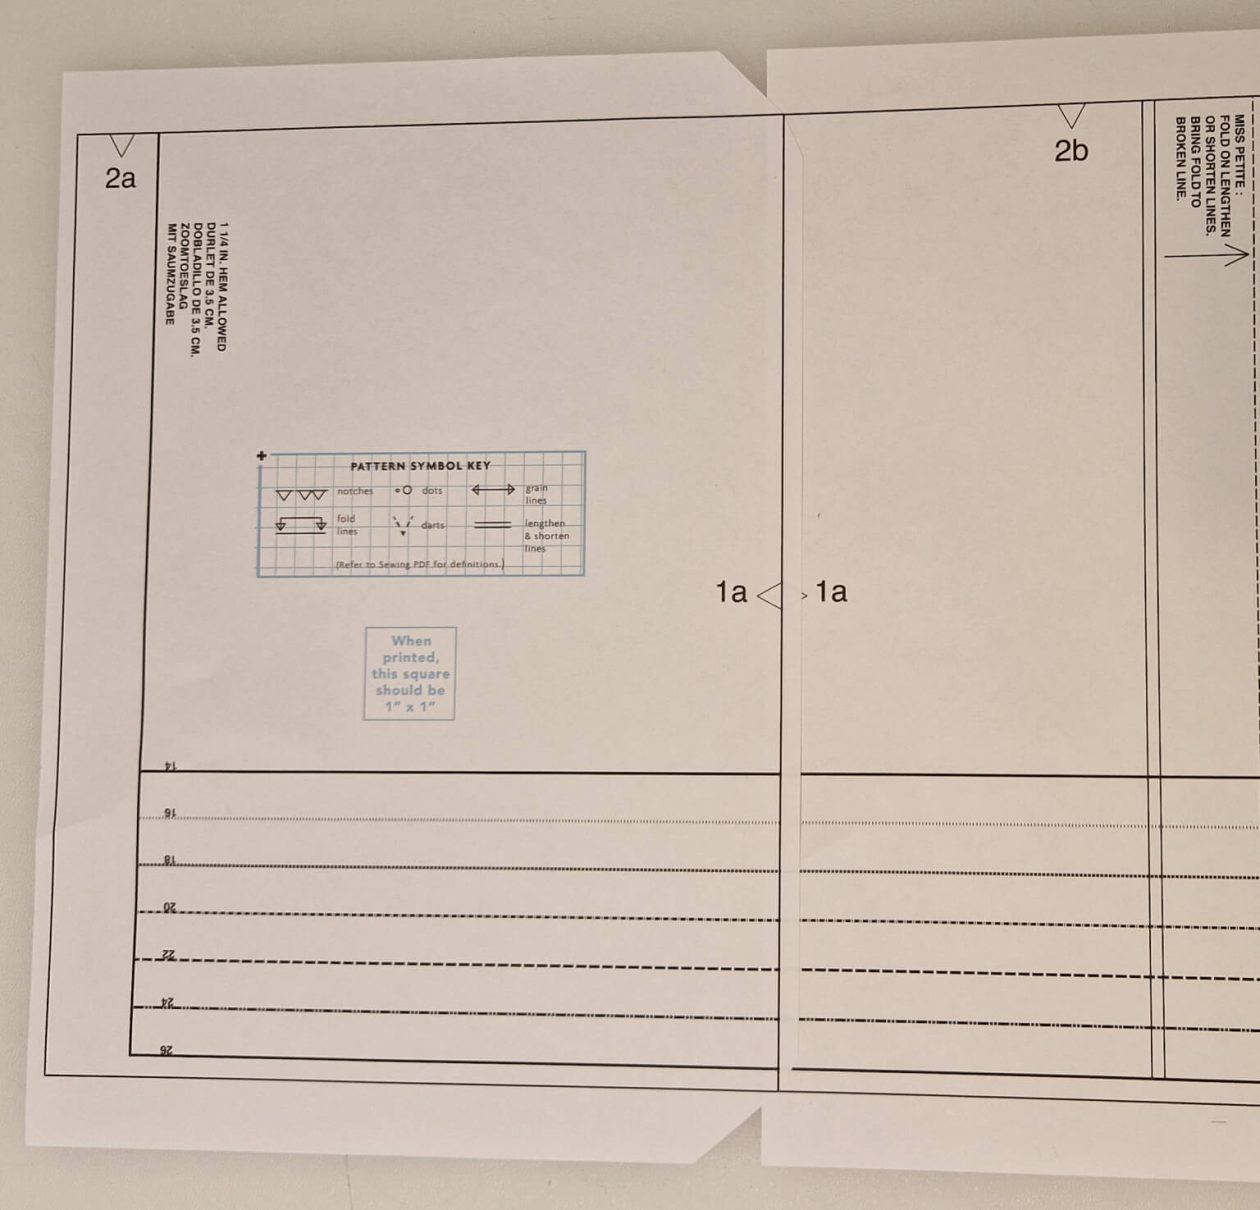
Once all your pattern is printed, use the pattern tile layout on the following page as your guide to assemble in the right order.
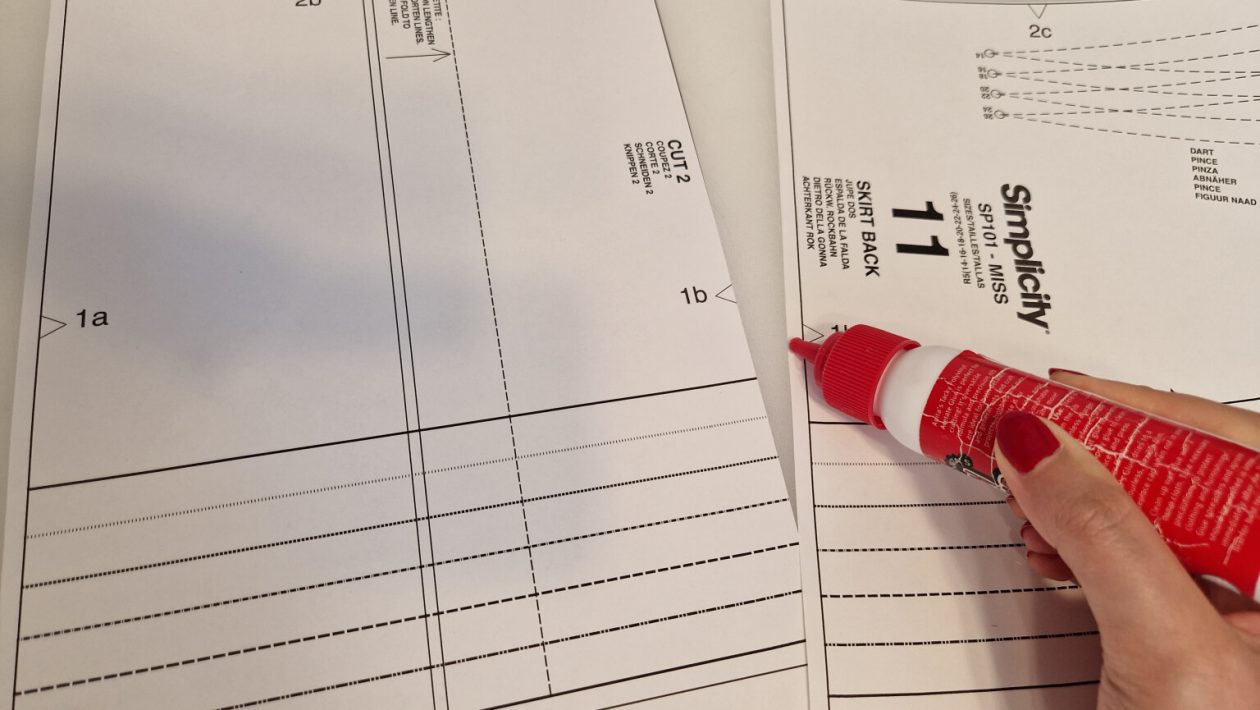
You will match the numbers and letters in each half diamond to create a whole diamond icon. In order to form a complete diamond icon, you will need to overlap the pattern tile edges.
We’ll now show you two methods for sticking your tiles together in order.

TOP TIP!
It helps if you kept your tiles in the order they were printed as this makes it easy to find the next one you need to complete your column!
Method 1
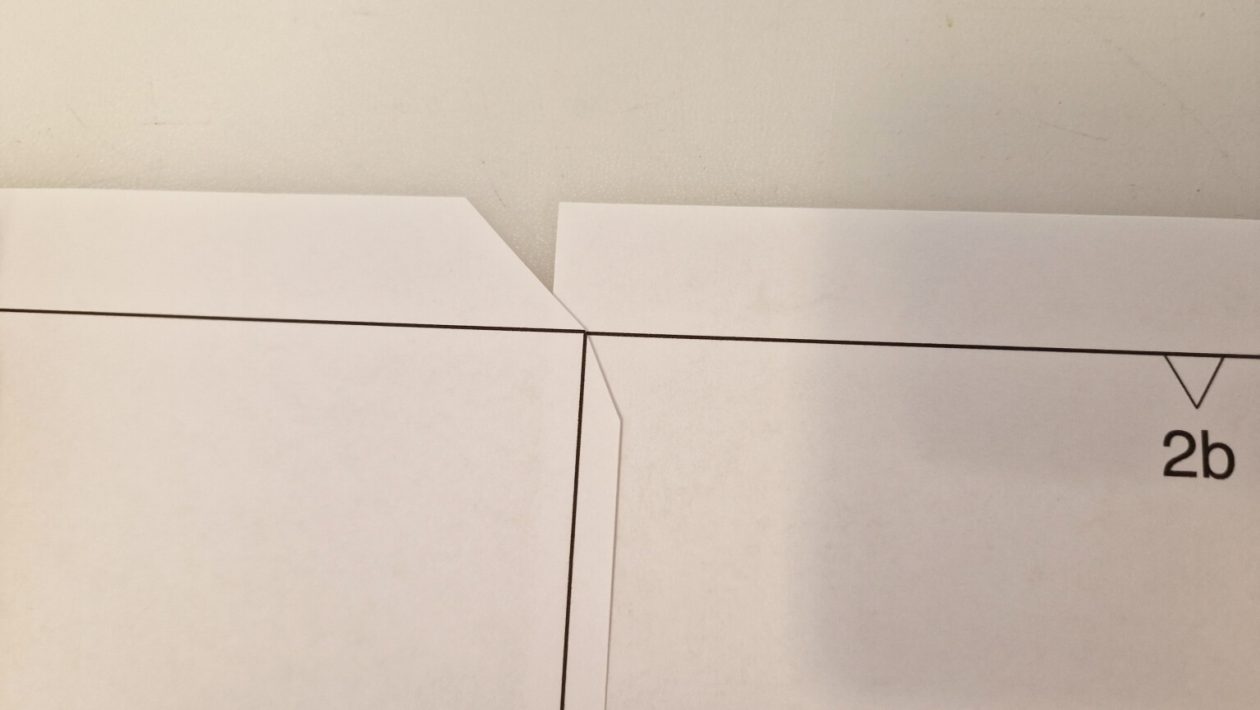
Use scissors or a paper guillotine to trim the TOP and then the RIGHT-HAND-SIDE edges of each tile along the box edge. You don’t need to cut the other sides in any way with this method.
The red outline on each page is your cutting line. The green registration marks are guides for overlapping and lining up the pages.

I recommend a guillotine as you can cut multiple pages at once, speeding up the process.
You can get these pretty cheaply and they’ll reduce strain on your wrists caused by cutting lots of pages by hand.

Now overlap your tiles: Overlay the pages using the green registration marks as a guide. They should line up exactly and cover each other. When lined up, tape into place.
For an blue diamond pattern, the border lines of each edge marked with a diamond icon should align, completing the diamond icon.
Sellotape the pieces together or use glue stick on the overlap to secure the tiles.
Method 2
This MUCH quicker method is great if you are short on time and are very familiar with sewing patterns.
Instead of making long cuts, you will just snip a triangular shape off the right-hand-side corners of the pages. Take care not to snip off the box corner, just get nice and close.

You can now overlap the tiles as you did before but focus on matching the corners of the box at the top and bottom.
The diamond shape will also match up as before but will be harder to see clearly with the overlap of paper still in the way.
You can tape or glue the tiles in place as you did for method 1.
Congratulations!
You’ve successfully assembled your PDF pattern and now can cut out the pieces you need.
Printing at Print Shop
Most people choose an online retailer that can print and ship your A0 pattern directly to you. You may also wish to take your pattern to a local print shop aka a local retailer that offers large format printing.
A0 tile prints should be printed at “Actual Size” (100%). A0 files can be printed on 48” x 36” sheets in landscape orientation.
Please Note: If you’ve received a multi-page A0 file, the first page includes a layout diagram. This advises you if any pieces are too big for a single sheet and need to be assembled before starting your project. That layout can be omitted when printing to reduce both waste and cost. A0 files with only one page will not include the tile layout diagram.
Free PDF Sewing Pattern
Try out your new PDF printing skills with our Simplicity 3002 blouse which is a FREE PDF sewing pattern in sizes 10-38W. It is also available as a Paper pattern priced £13.50 for those who prefer physical patterns.
It includes print at home and A0/Copyshop file sizes in the download.
Get your FREE PDF sewing pattern by visiting the product and selecting the PDF option.

Simplicity Sewing Pattern S3002 Misses’ and Women’s Blouses
Button front blouses have collar with stand, shaped hem, and sleeves with inverted pleats gathered into buttoned cuffs or bands.